Visual Studio Template from Configured C/C++ Console App
Date Created: 05-05-2026
Overview
The purpose of this writeup is to document how I configure a C project and generate a reusable template for future projects. This tutorial will go over creating a C/Cpp Console App, adjusting default settings for better work flow, test building project, and finally exporting the skeleton project to a Visual Studio template for repeated use.
Please Note: I create all of my Visual Studio templates for C language development.
Table of Contents
- Create a new C/C++ console app
- Adjust Project Settings
- Export as a Visual Studio template
- Using the template
- Download the exact template
System Requirements
- IDE Version: Microsoft Visual Studio 2022 Version 17.14.14.
- OS Version: Windows 11 Pro
Create a new C/C++ console app
Below are the steps to create a new Visual Studio C/C++ console app:
- Open Visual Studio IDE
- Select Create New Project
- Search for
cpp console appand select the proper project, then click Next.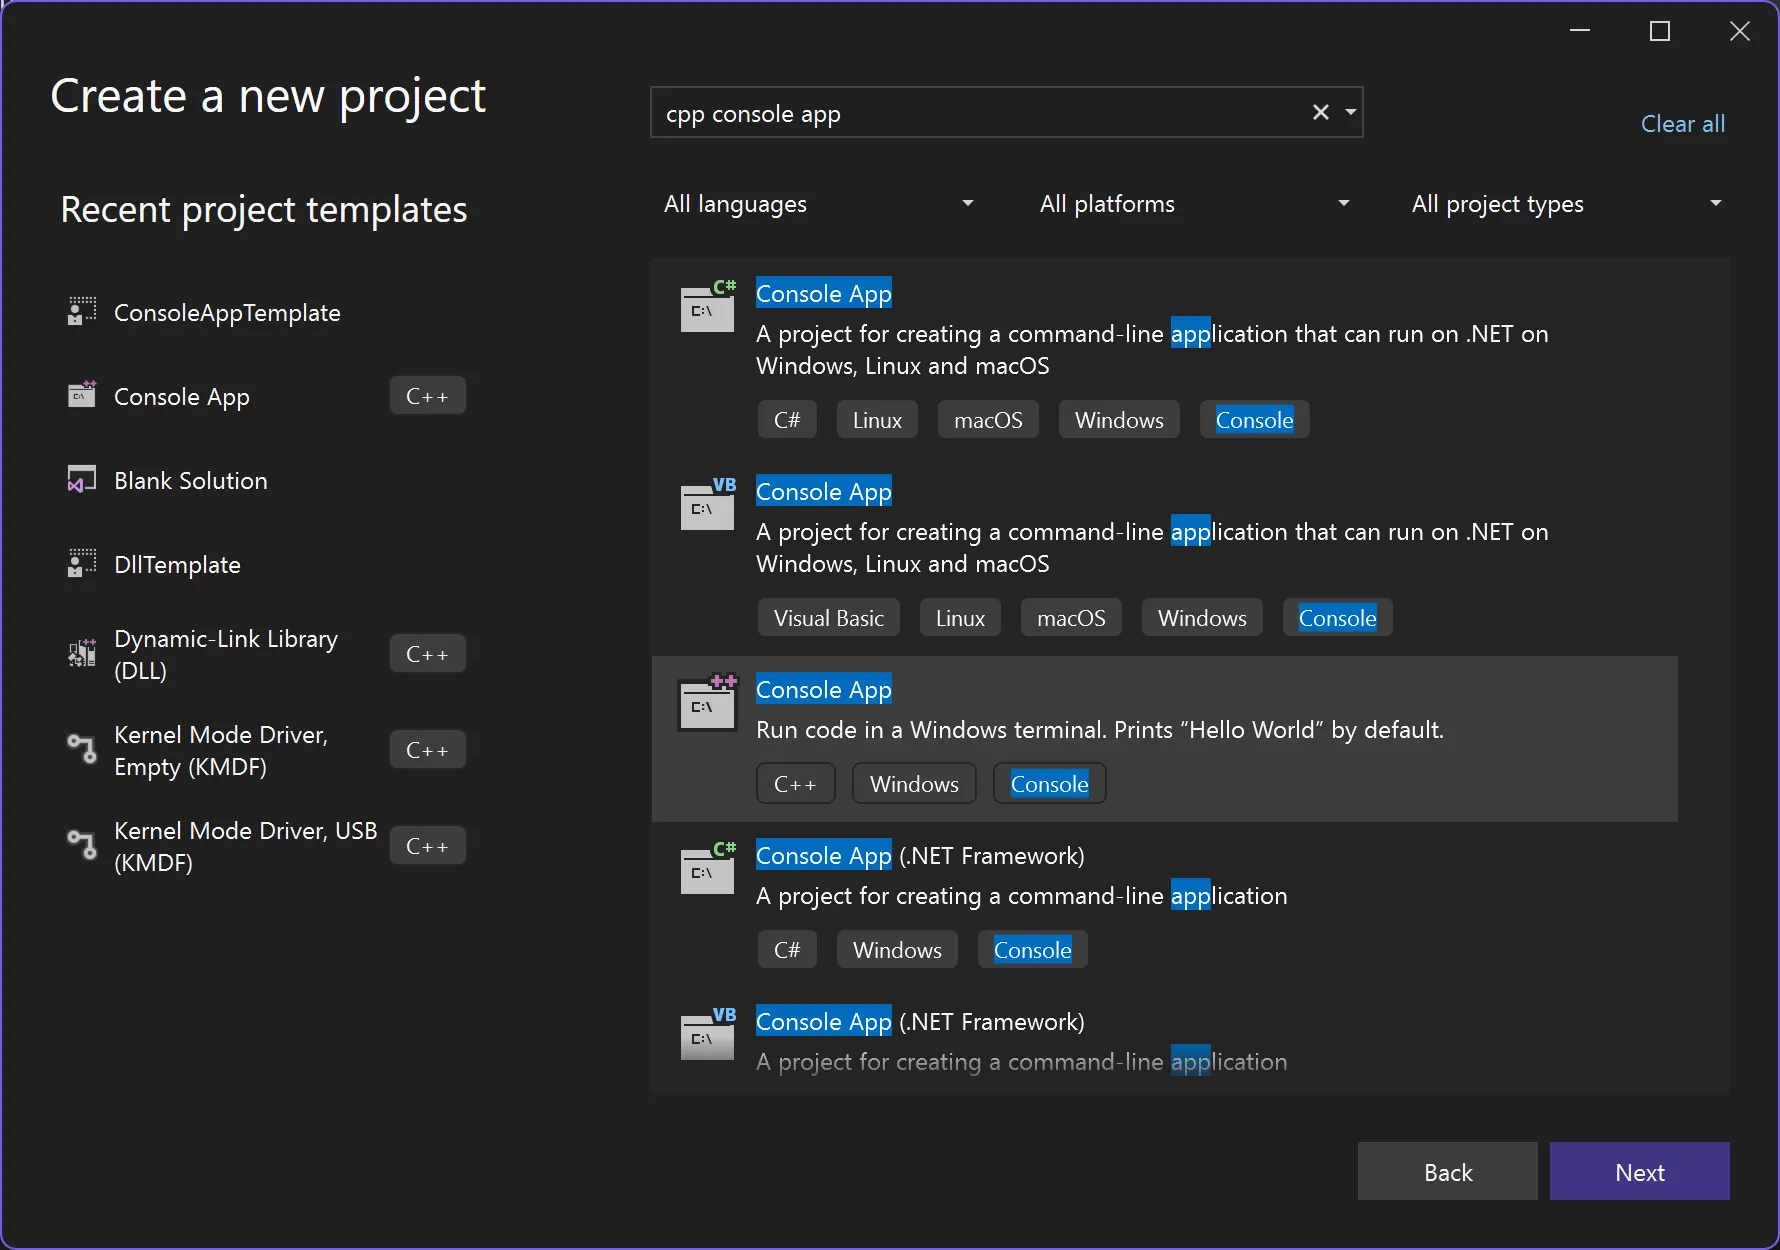
- Configure the Template Project Settings, the click Create
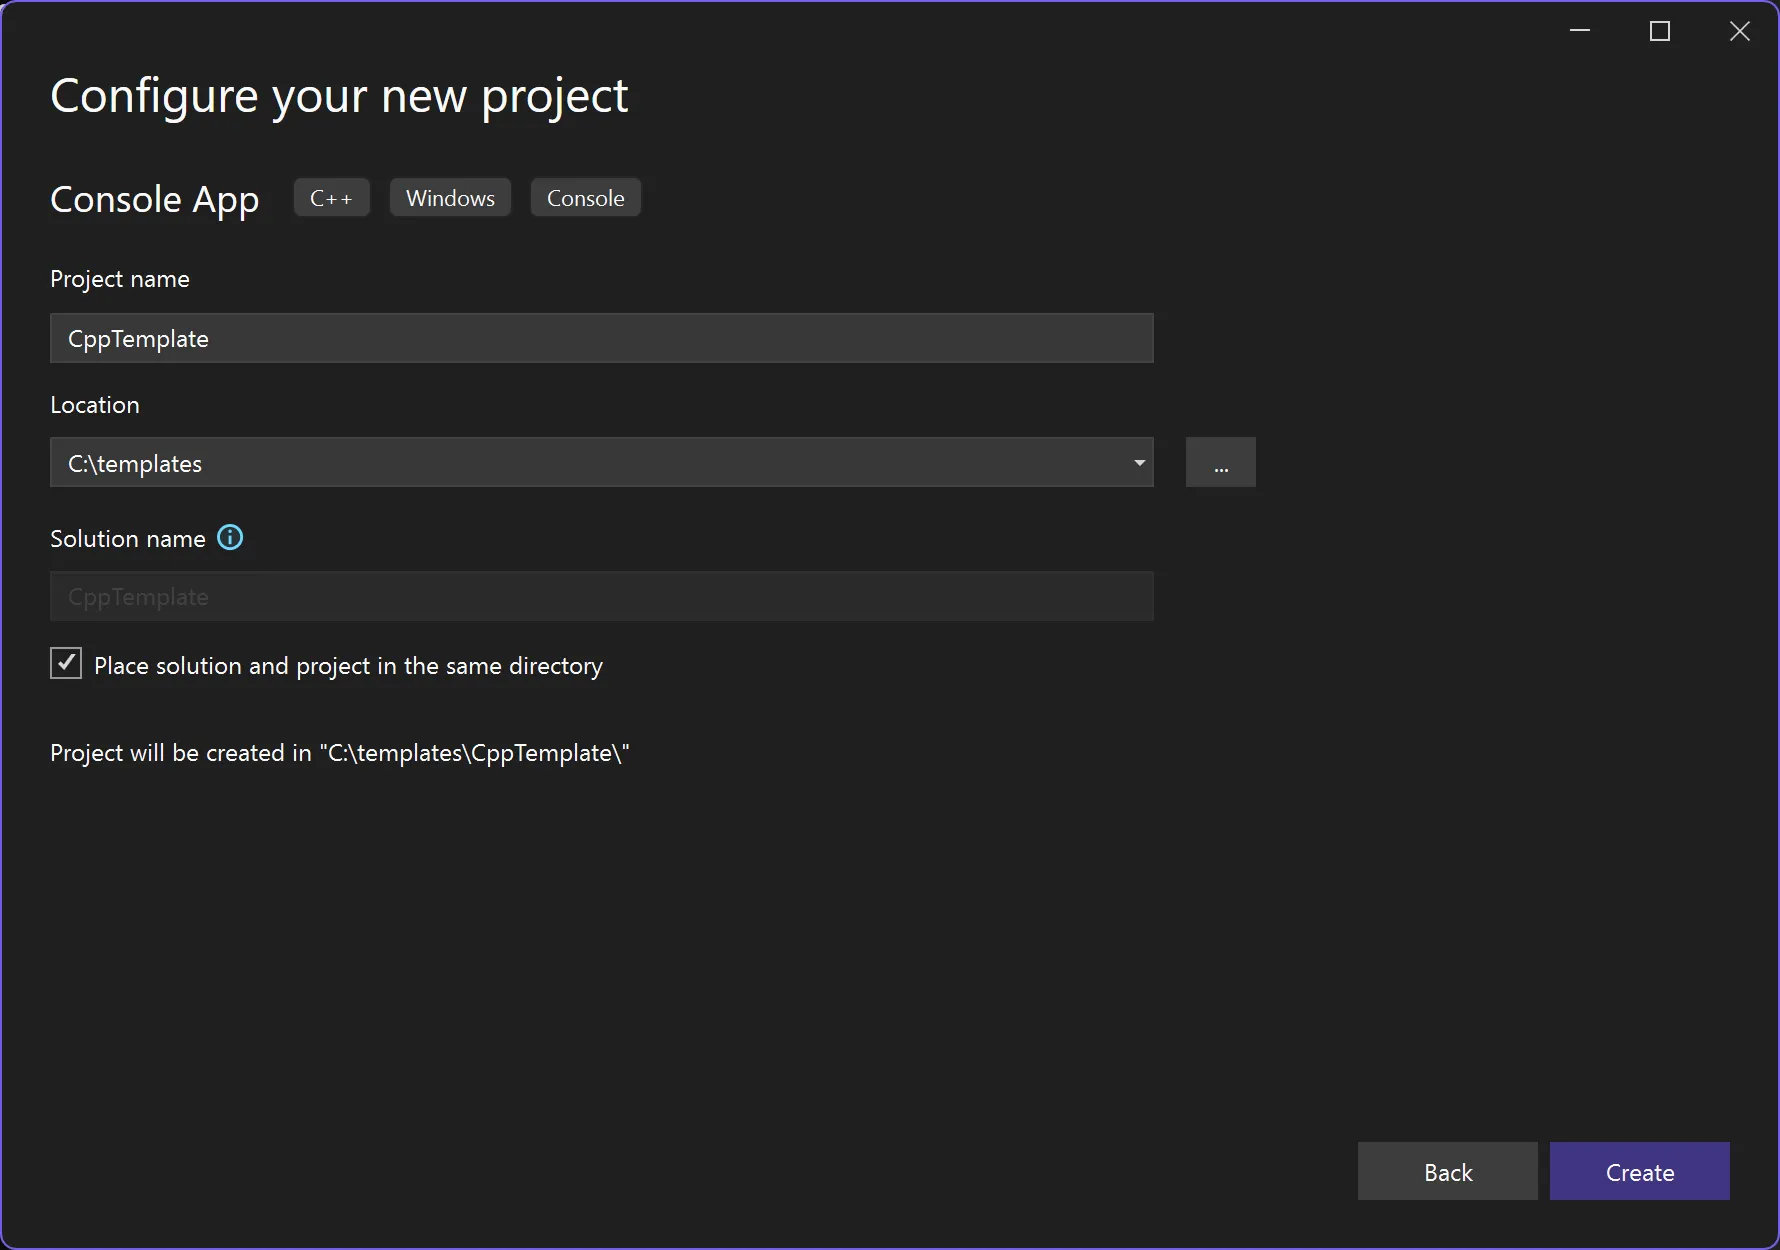
- Visual Studio IDE will then open your default
CppTemplateproject with the genericHello Worldwritten in Cpp.
Adjust Project Settings
Add Main.c and sample source code
-
Rename
CppTemplate.cfile toMain.c -
Replace the contents of the new
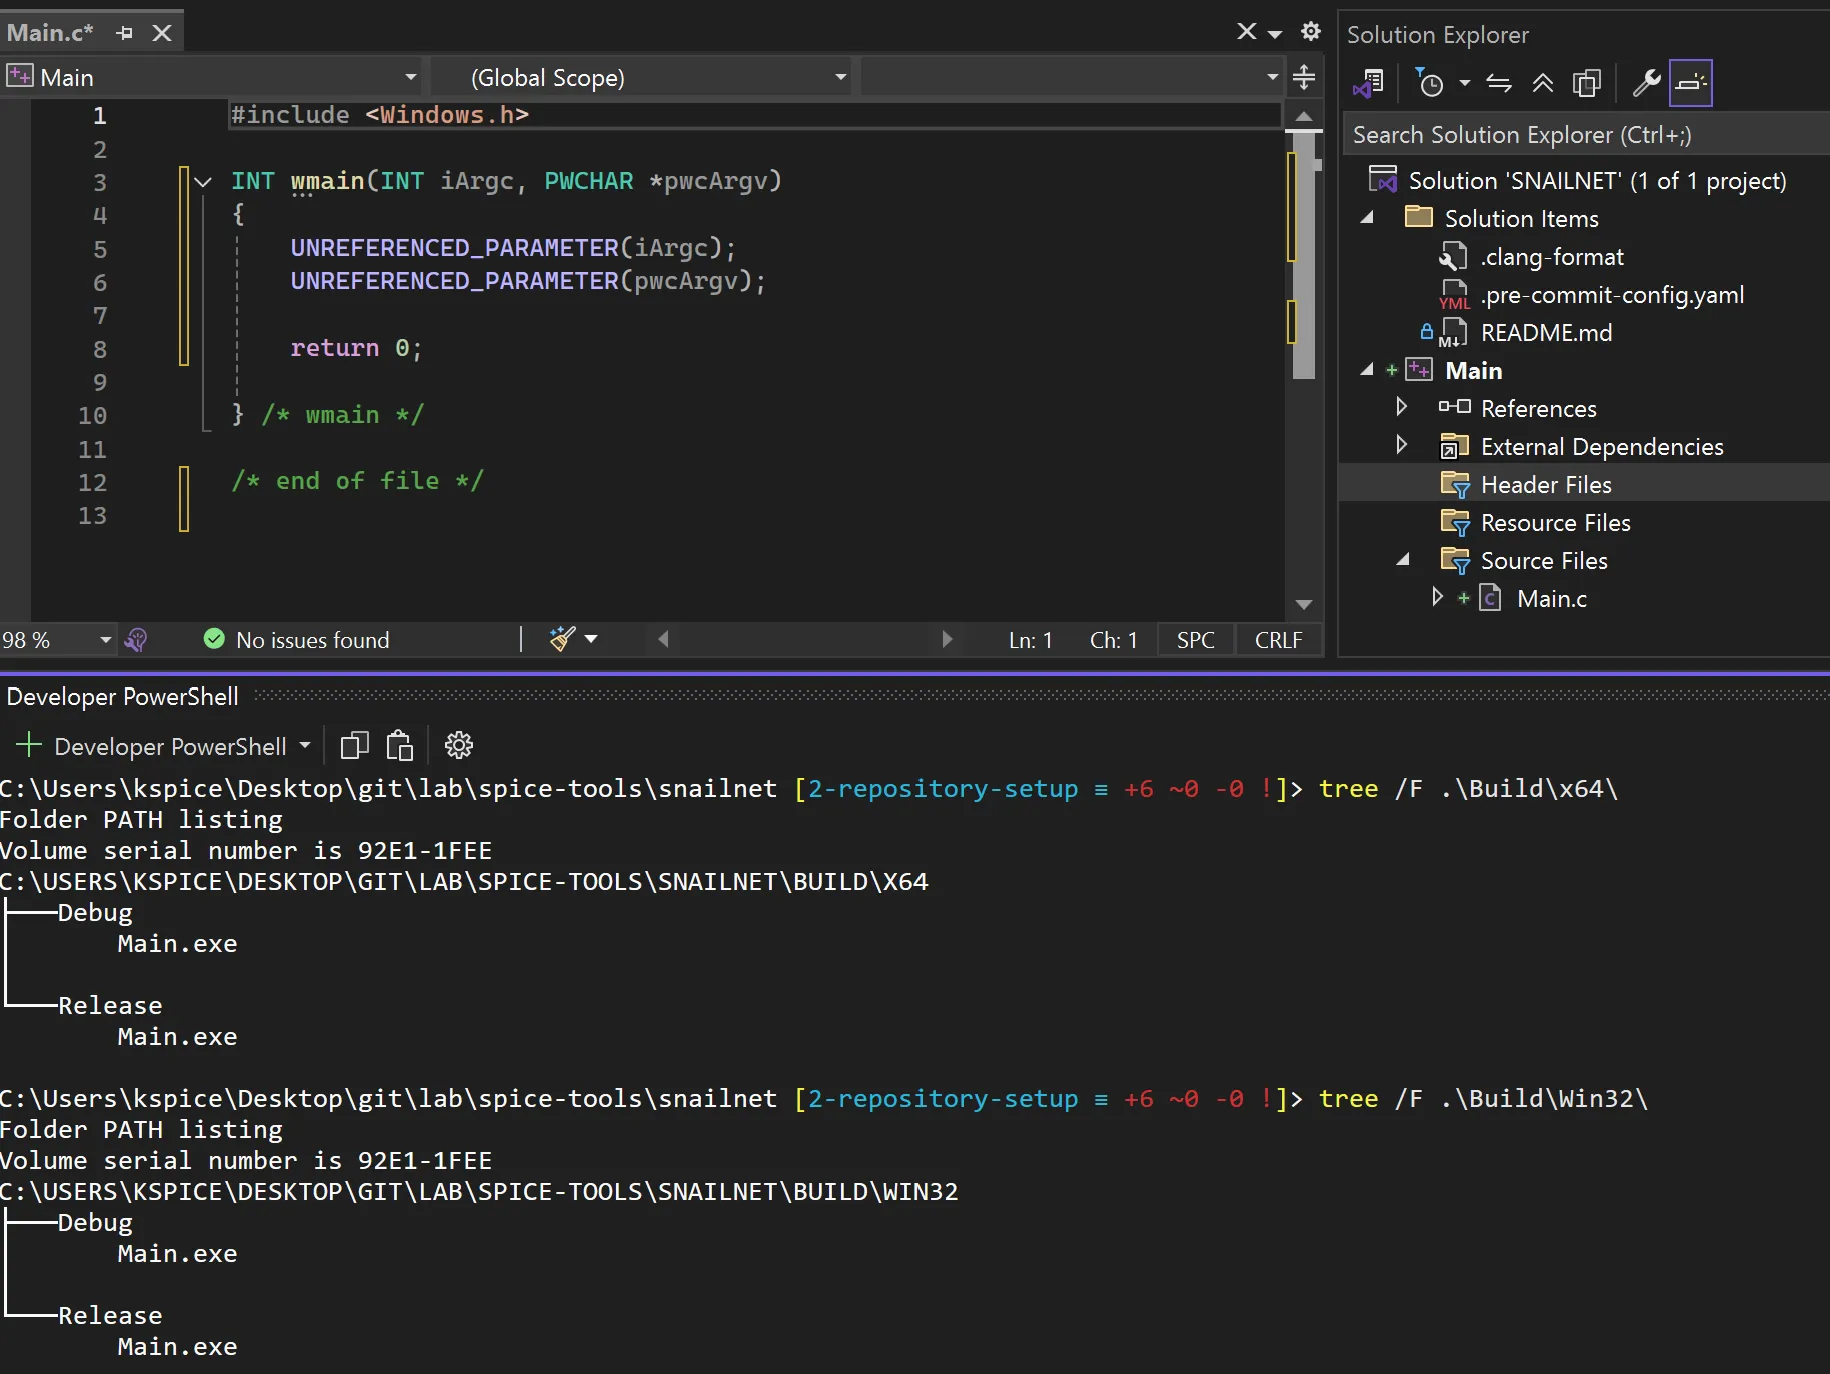
Main.cwith the following code:#include <Windows.h> INT wmain(INT iArgc, PWCHAR* pwcArgv) { UNREFERENCED_PARAMETER(iArgc); UNREFERENCED_PARAMETER(pwcArgv); return 0; } /* wmain */ /* end of file */ -
Your project should look similar to the following image:

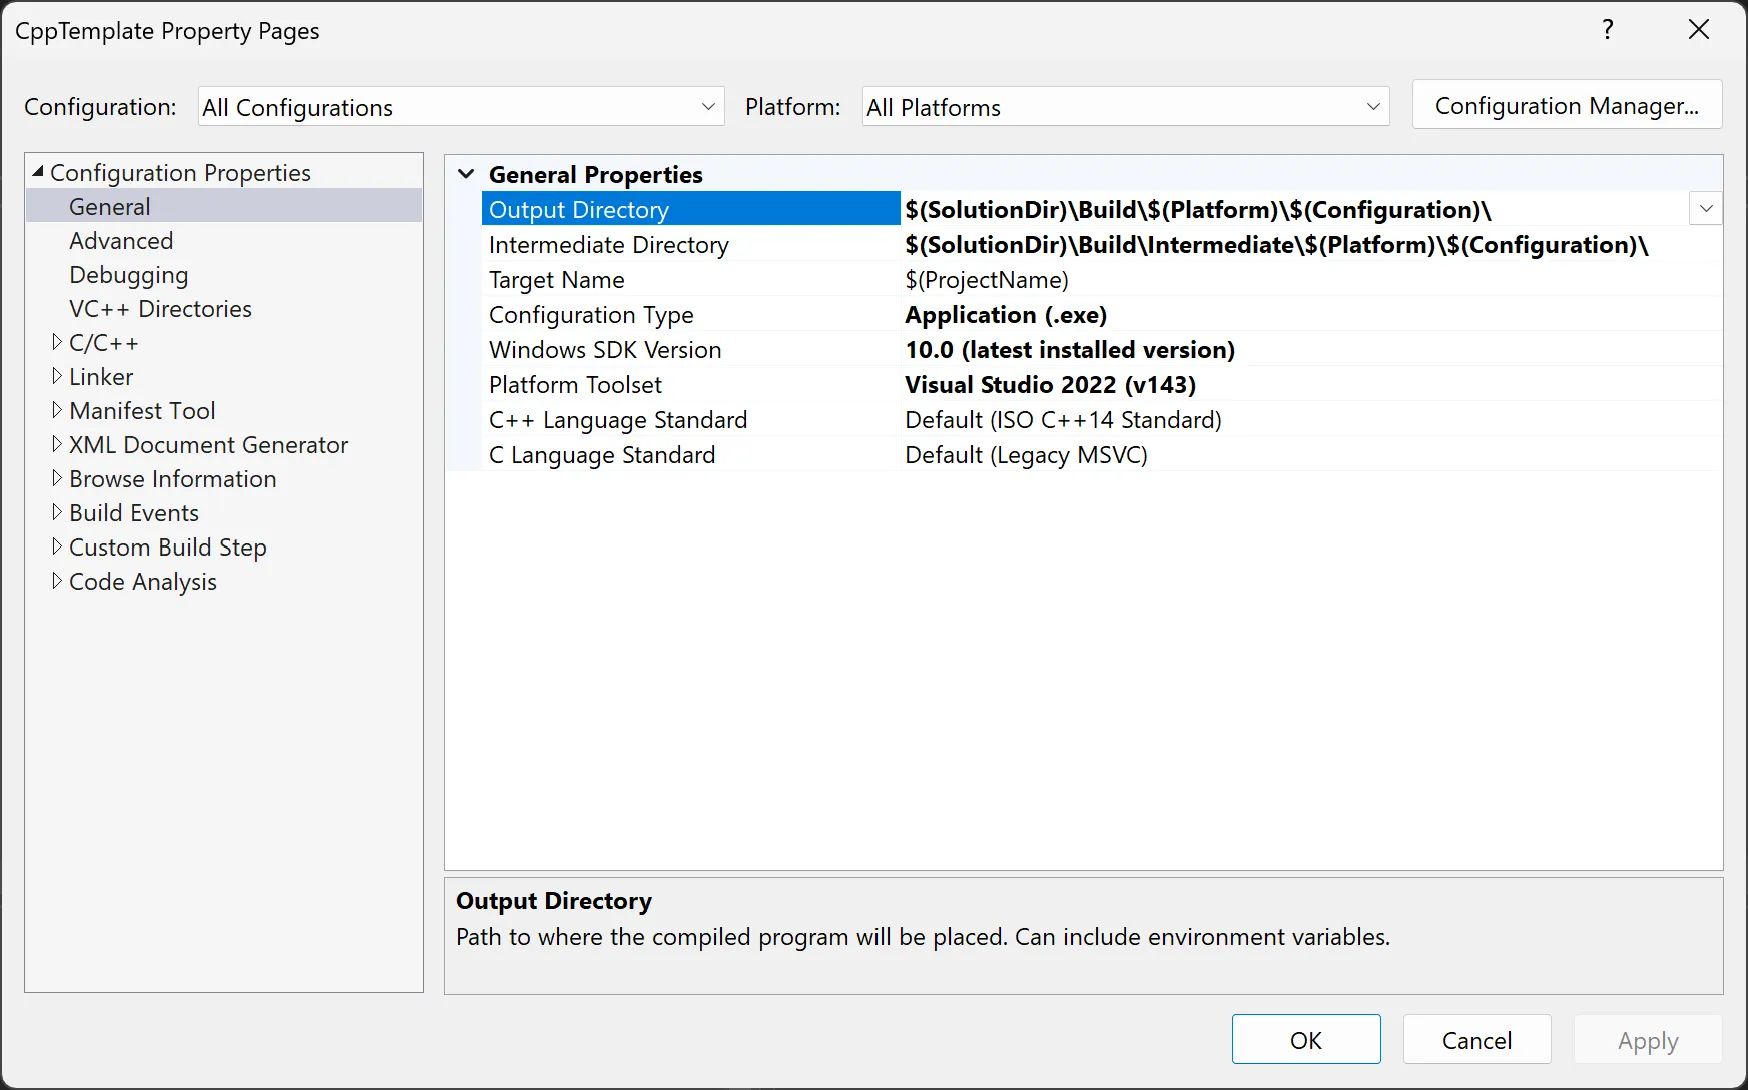
Update Default Output and Intermediate Directories
By default, when Visual Studio builds your programs, the x64|x86 directories are created separately and placed next to the project settings files. Once you expand your project to include multiple static libraries, etc., the generated files are scattered all throughout your repository. I prefer to alter two project settings (Output Directory, Intermediate Directory) placing all generated build files into the same path for easy use and cleanup.
-
Navigate to the Solution Explorer and right click
CppTemplateproject. -
Click
properties -
Ensure
All Configurations and All Platformsare selected, if this is your preference. -
Update
Configuration Properties > General > Output Directoryto the following$(SolutionDir)\Build\$(Platform)\$(Configuration)\ -
Update
Configuration Properties > General > Intermediate Directoryto the following:$(SolutionDir)\Build\Intermediate\$(Platform)\$(Configuration)\ -
Click
Applyand now you project will place all build artifacts in a single folder and subfolder for easy use later on.
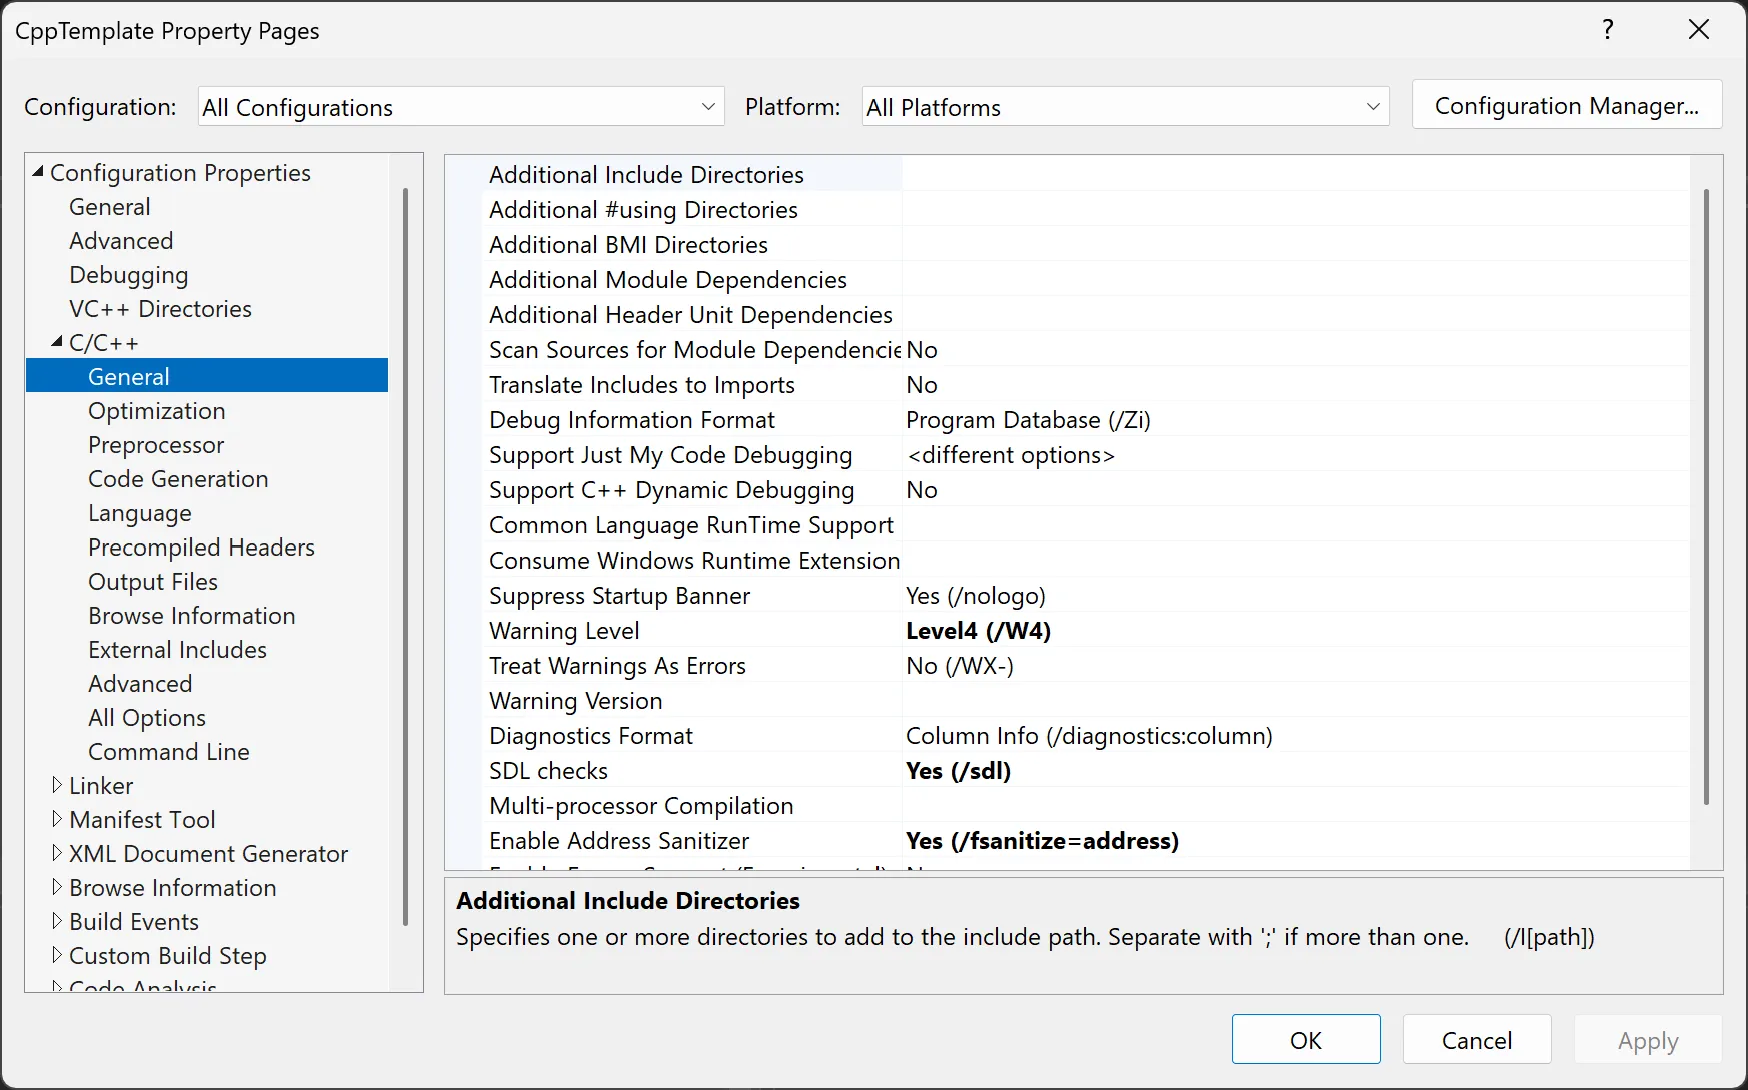
Add Build Hardening with Warning Level 4 and Address Sanitizer
- Right click the
CppTemplateproject and selectproperties - Ensure
All Configurations and All Platformsare selected - Update
Configuration Properties > C/C++ > Warning LeveltoWarning Level 4 - Update
Configuration Properties > C/C++ > Enable Address SanitertoYes (/fsanitize=address) - Select
Applyto save the settings
Conduct a Test Build
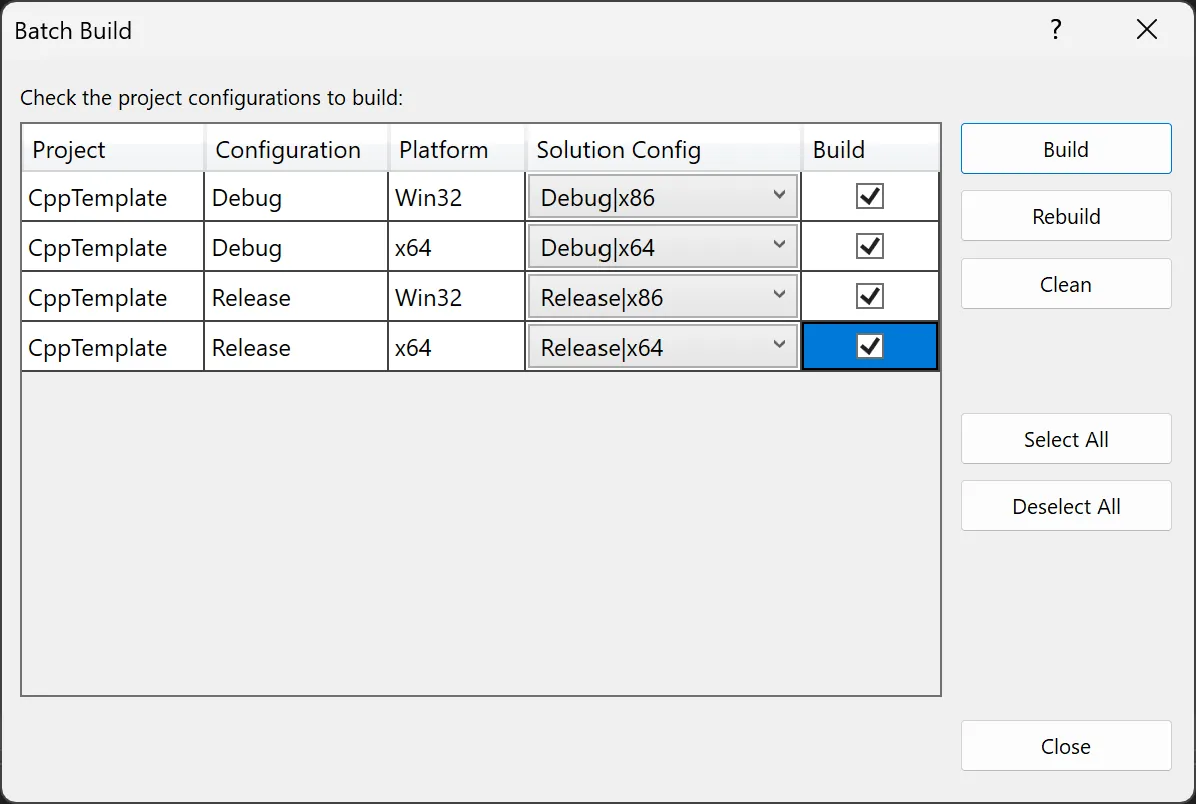
Once you are content with the updates, I like to run a test build of all configurations [x64|x86|DEBUG|RELEASE] to ensure everything builds without warnings/errors. To build all configurations in one easy step, you can use the Batch Build feature in Visual Studio.
- Navigate to the
Build > Batch Buildand select all configurations you would like to test build. - Then select
Build
-
The Batch Build job will build all selected versions of your project and place them in the proper output and intermediate directories. In this case, all generated files will be places in the
$SolutionDir > Buildpath. -
Open a terminal inside the Visual Studio IDE through
View > Terminaland a VS Developer Terminal will open in the current working directory. -
Ensure your
BuildandBuild/Intermediatefolders were created and contain the proper files.
C:\templates\CppTemplate> tree /F .\Build\x64\
Folder PATH listing
Volume serial number is 92E1-1FEE

C:\TEMPLATES\CPPTEMPLATE\BUILD\X64
├───Debug
│       CppTemplate.exe
│       CppTemplate.pdb
│
└───Release
        CppTemplate.exe

C:\templates\CppTemplate> tree /F .\Build\Win32\
Folder PATH listing
Volume serial number is 92E1-1FEE
C:\TEMPLATES\CPPTEMPLATE\BUILD\WIN32
├───Debug
│       CppTemplate.exe
│       CppTemplate.pdb
│
└───Release
        CppTemplate.exe
Export as a Visual Studio template
Once you are happy with the outcome, follow these steps to turn a VS project into a template.
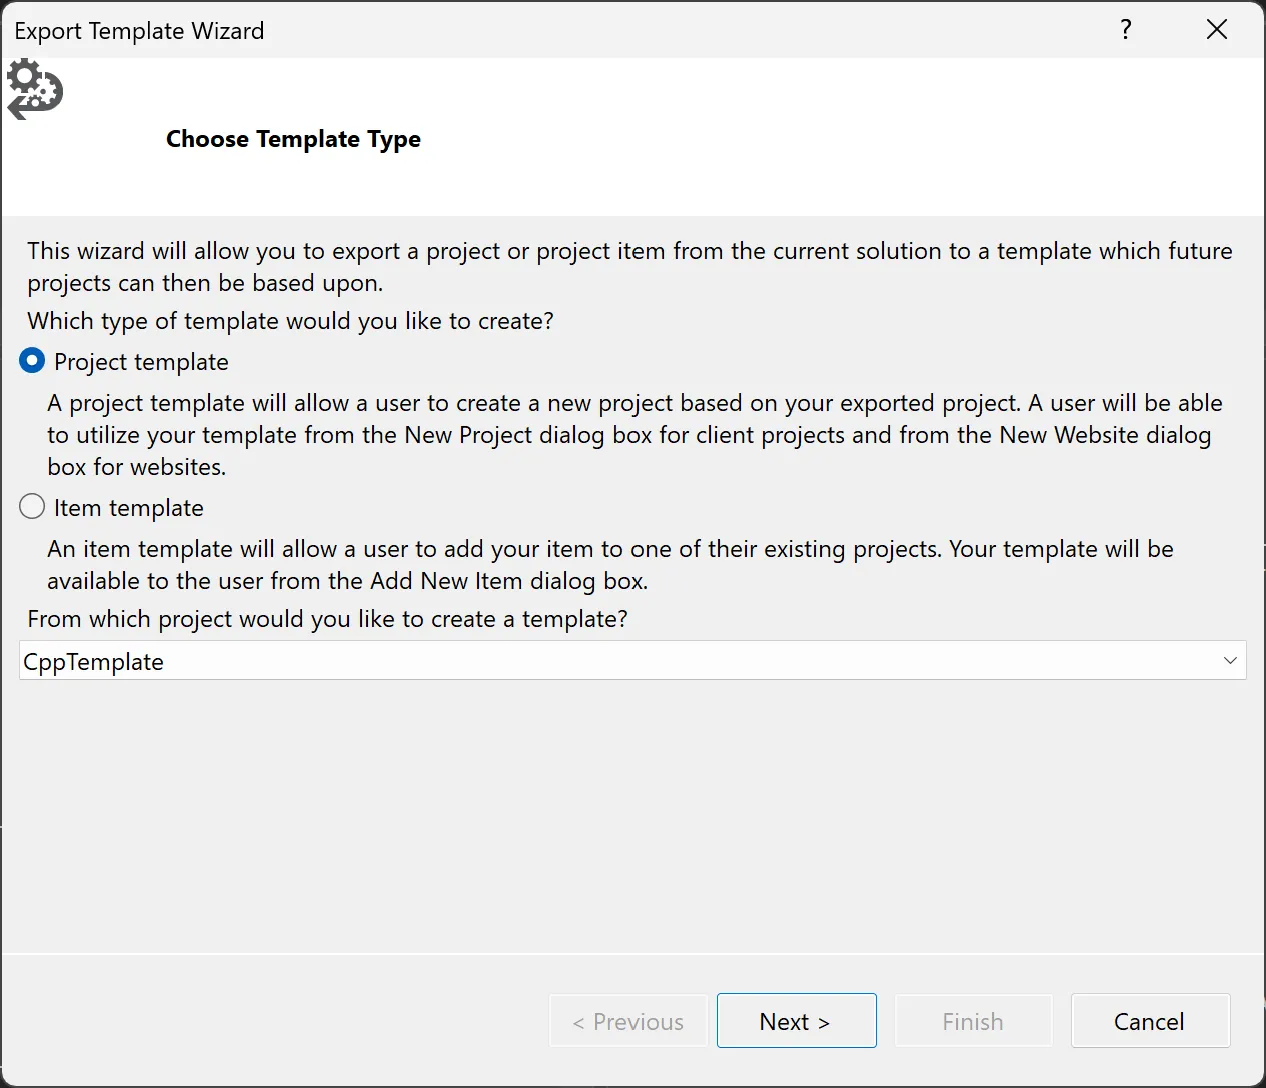
- On the top VS tool bar select
Project > Export Template - Select
Project Templateand ensure the correct project is selected, then selectNext.
- Add personalization settings and keep the default paths / options. Visual Studio will know where to find your templates and load them each time for easy access.
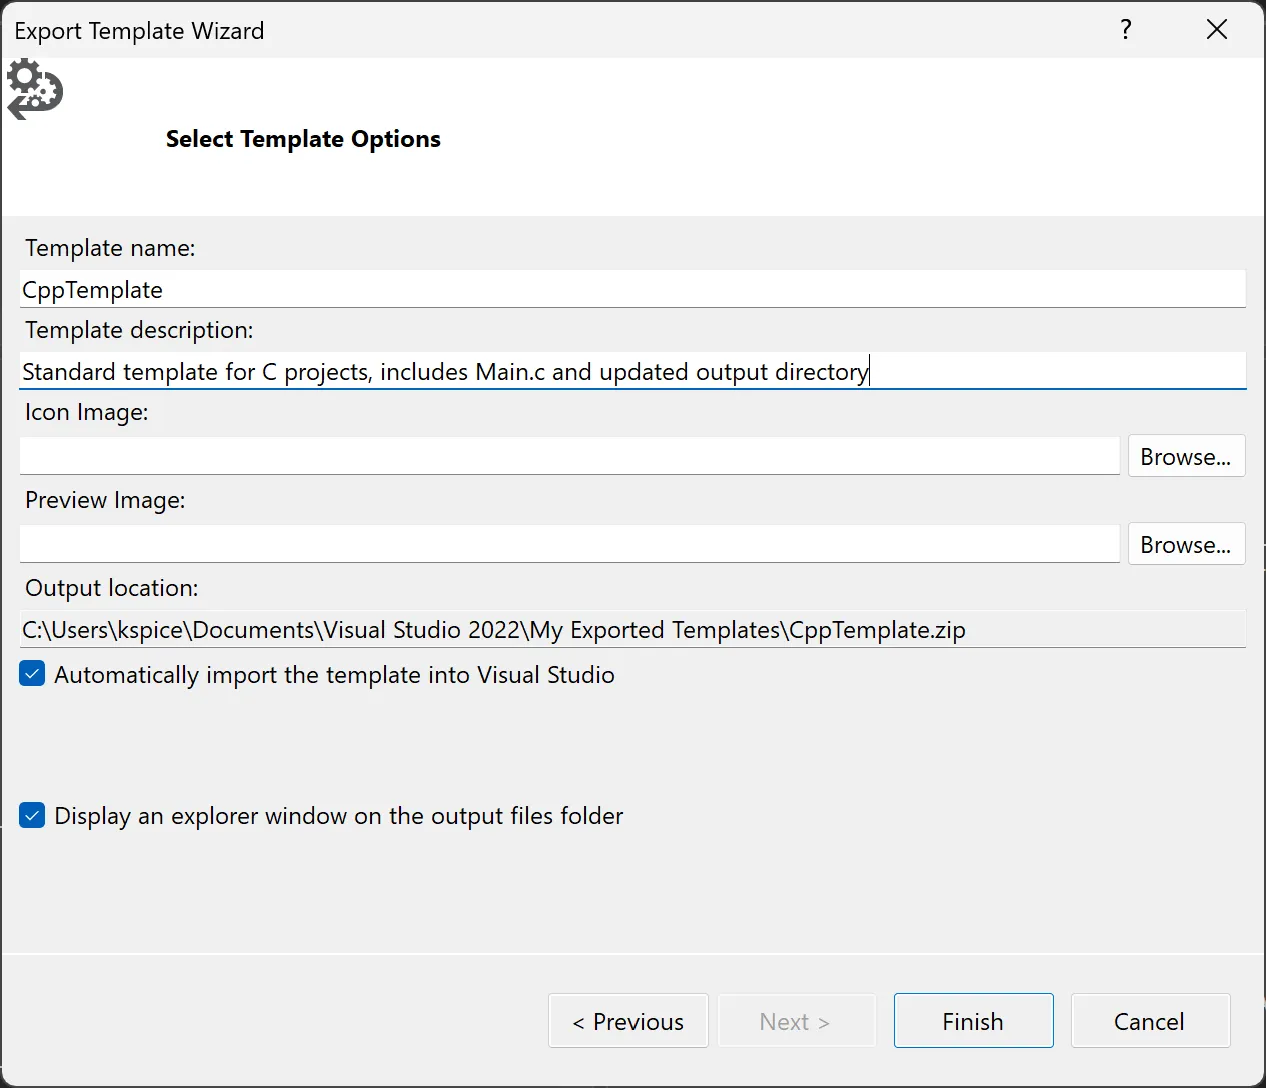
- Select
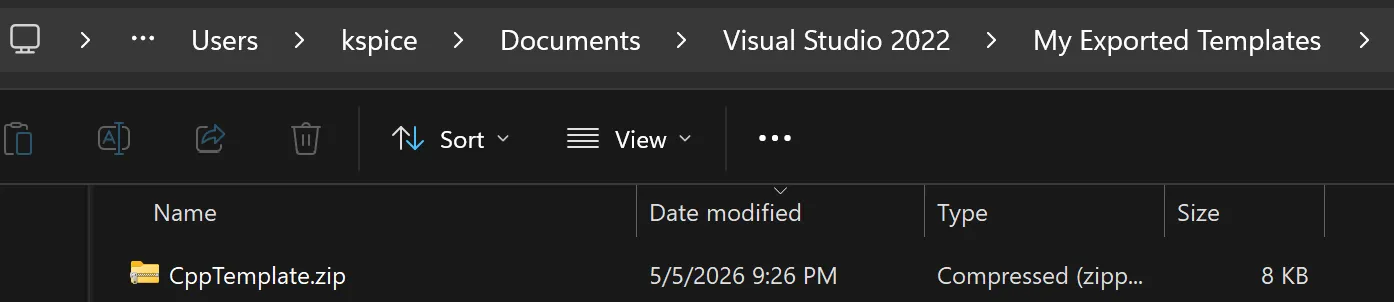
Finishto create the template. - Verify your template.zip was created and placed in the proper folder.
Using the template
To use your template, follow these steps:
- Create a new Visual Studio Solution in a new directory.
- Right click > Add > New Project
- You will see the
CppTemplateproject preloaded. - Select
CppTemplate, thenNext - Give your project a name, ensure the path is correct, and select
Create
Now you have a new project with all of your template configurations ready to use. To test, you can simple build your project to verify all repository shortcut links work properly in the new location.
There may be some additional settings you wish to adjust, but this should get you pointed in the right direction.
Download the exact template
If you’d like to use the exact templates from this series, you can download them from my GitLab repository: