Table of Contents
- Overview
- Create Ubuntu Server VM in Proxmox (Docker Services VM)
- Install Docker Engine on Ubuntu Server
- Starting Arcane Docker Management Service
- References
Overview
This writeup documents how I set up a dedicated Docker services environment on my Homelab Proxmox server. The goal is to have a single, well-organized virtual machine that runs Docker Engine for hosting containerized services, and Arcane (or something comparable) as a web-based Docker manager so I can deploy, monitor, and update those services from a browser instead of always SSHing into the host.
My Homelab theme is The Chocolate Factory and my Proxmox host is named wonka, and the VM that will run all the Docker containers is the Oompa Loompa Task Force (OLTF). The OLTF lead VM is oltf-hq, and the Proxmox Resource Pool that groups all OLTF-related VMs and containers is named oompa-loompa-task-force. This naming makes the relationship clear at a glance: Wonka provides the infrastructure and the task force (OLTF) does the actual work.
By the end of this writeup, I’ll have:
- Proxmox Resource Pool grouping all
OLTFresources - Ubuntu Server 26.04 LTS VM (
oltf-hq) provisioned and running - Docker Engine installed via Docker’s official APT repository
- Arcane running as a Docker container, accessible from a browser, ready to manage additional services

Create Ubuntu Server VM in Proxmox (Docker Services VM)
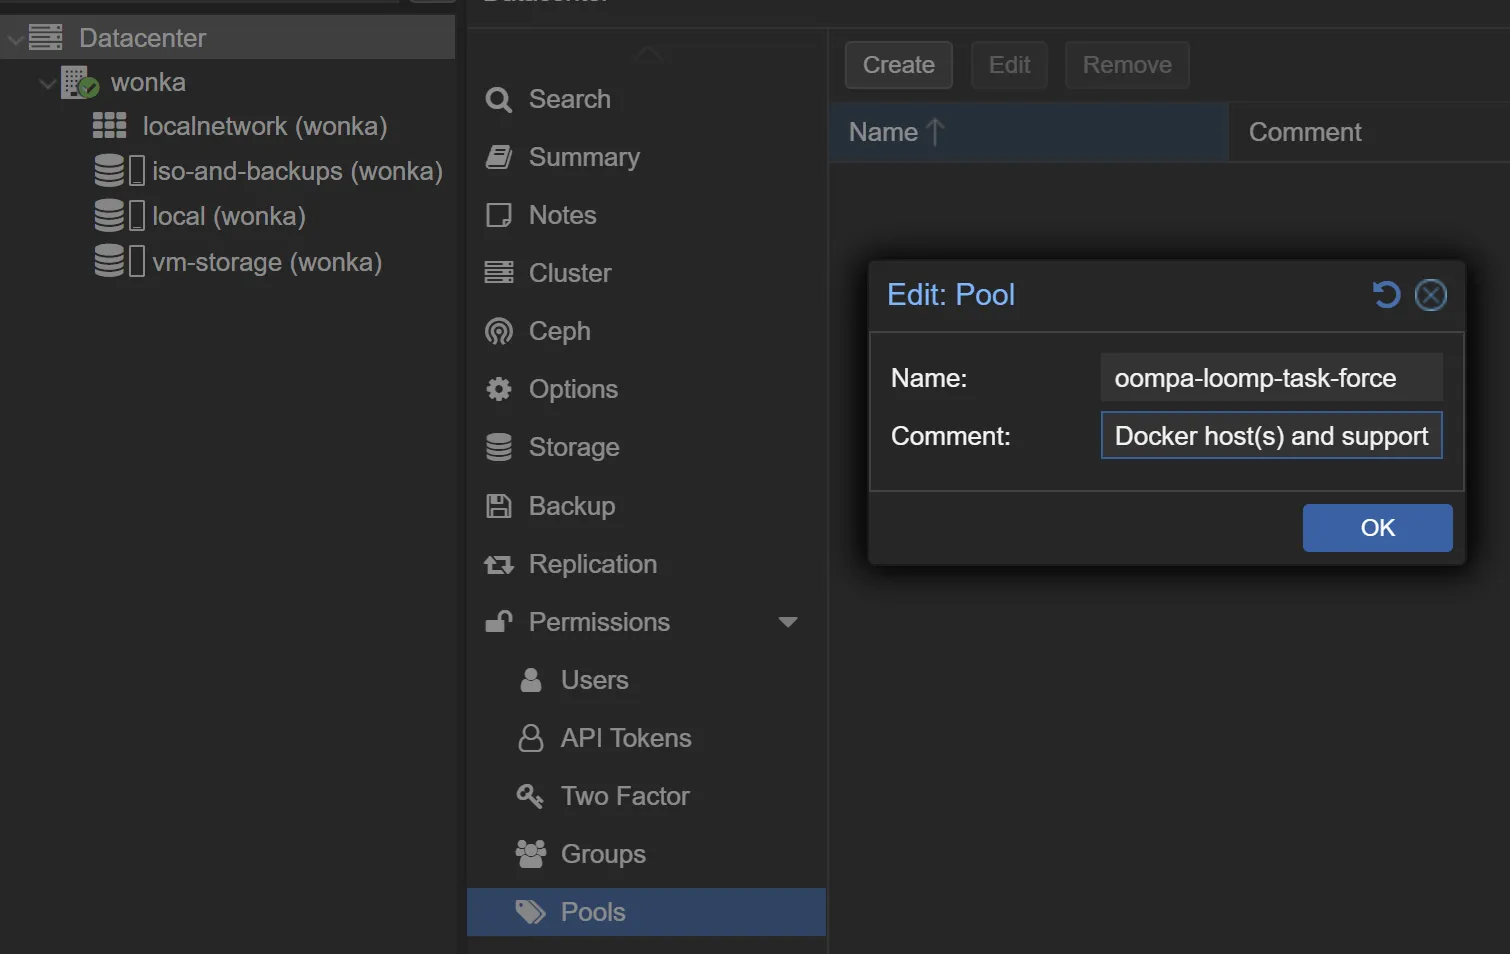
Step 1: Create Proxmox Resource Pool
Proxmox Resource Pools are logical groupings of virtual machines (VMs) and containers (CTs) designed for organized management and delegated permissions, allowing administrators to manage multiple tenants or workloads efficiently. Created at the Datacenter level, they simplify access control by assigning user permissions to the entire pool. See Proxmox forum thread for more.
To create a new resource pool, follow these steps:
- In proxmox, click
Datacenterin the left tree. - Click
Permissions -> Pools - Click
Create - Name the pool. (I’ll be naming my pool the oompa-loompa-task-force)
- Add comments if you’d like, then click
OK
Naming the resource pool
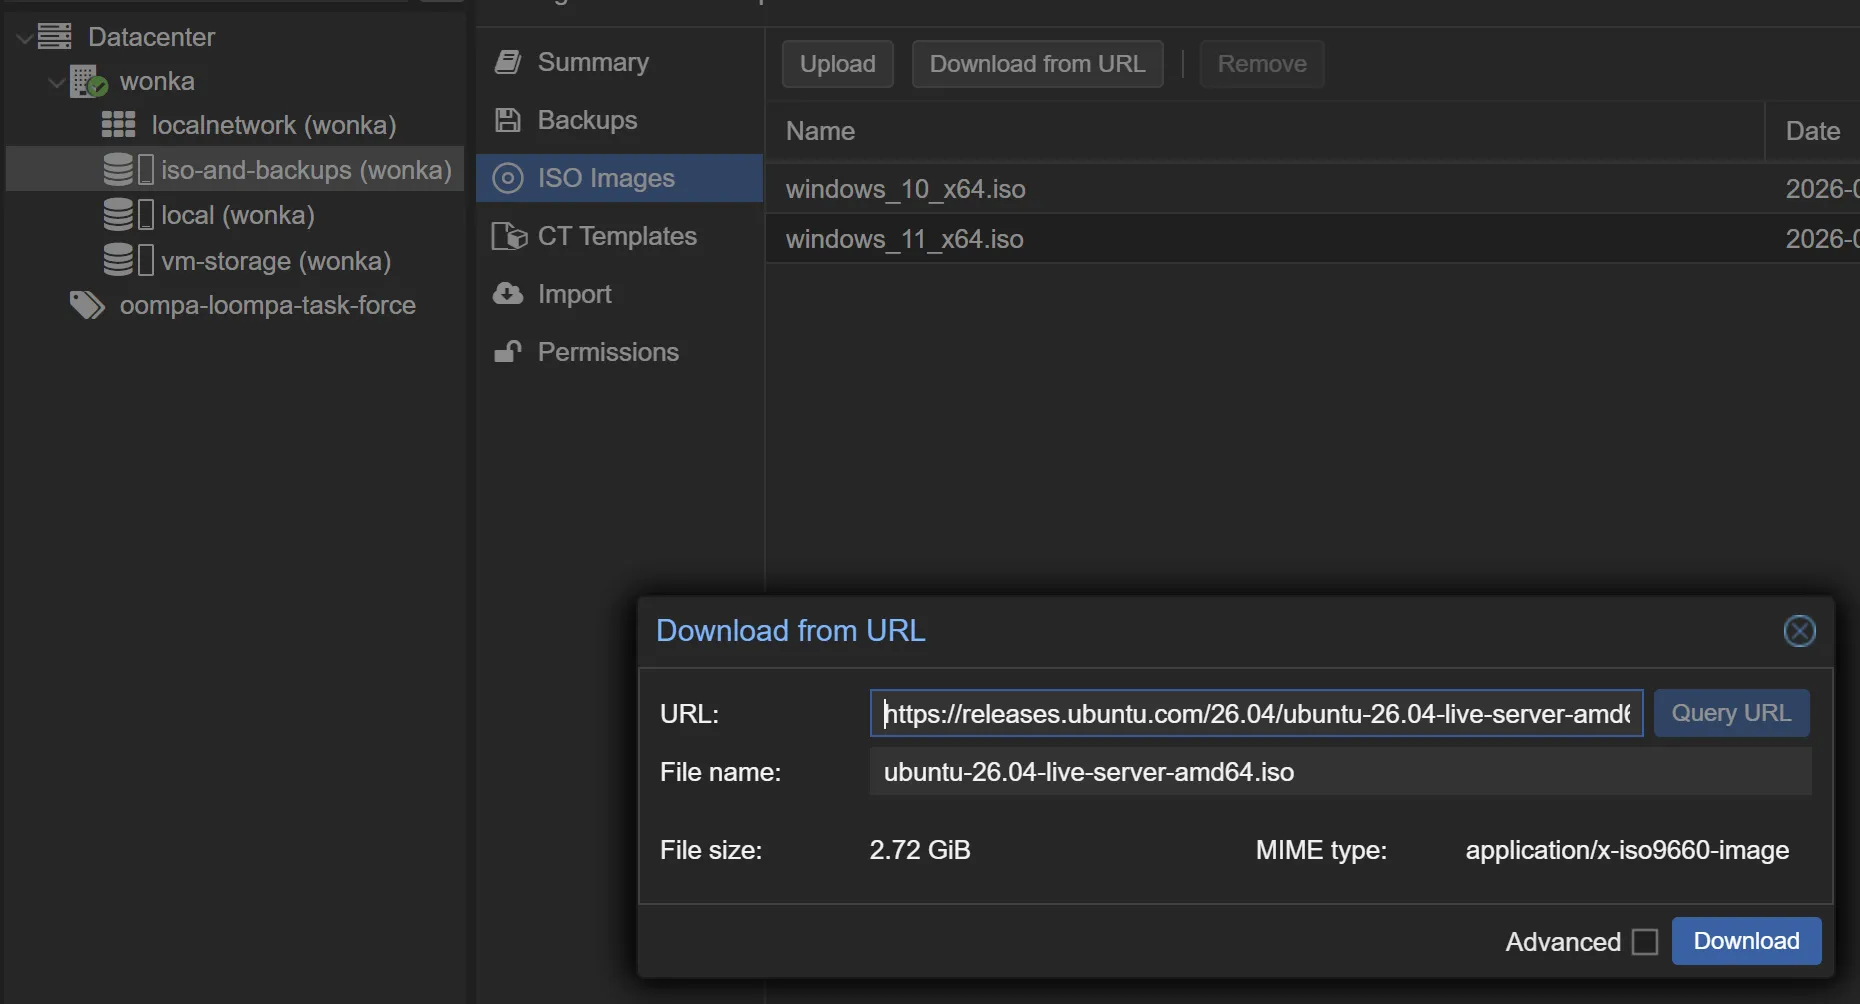
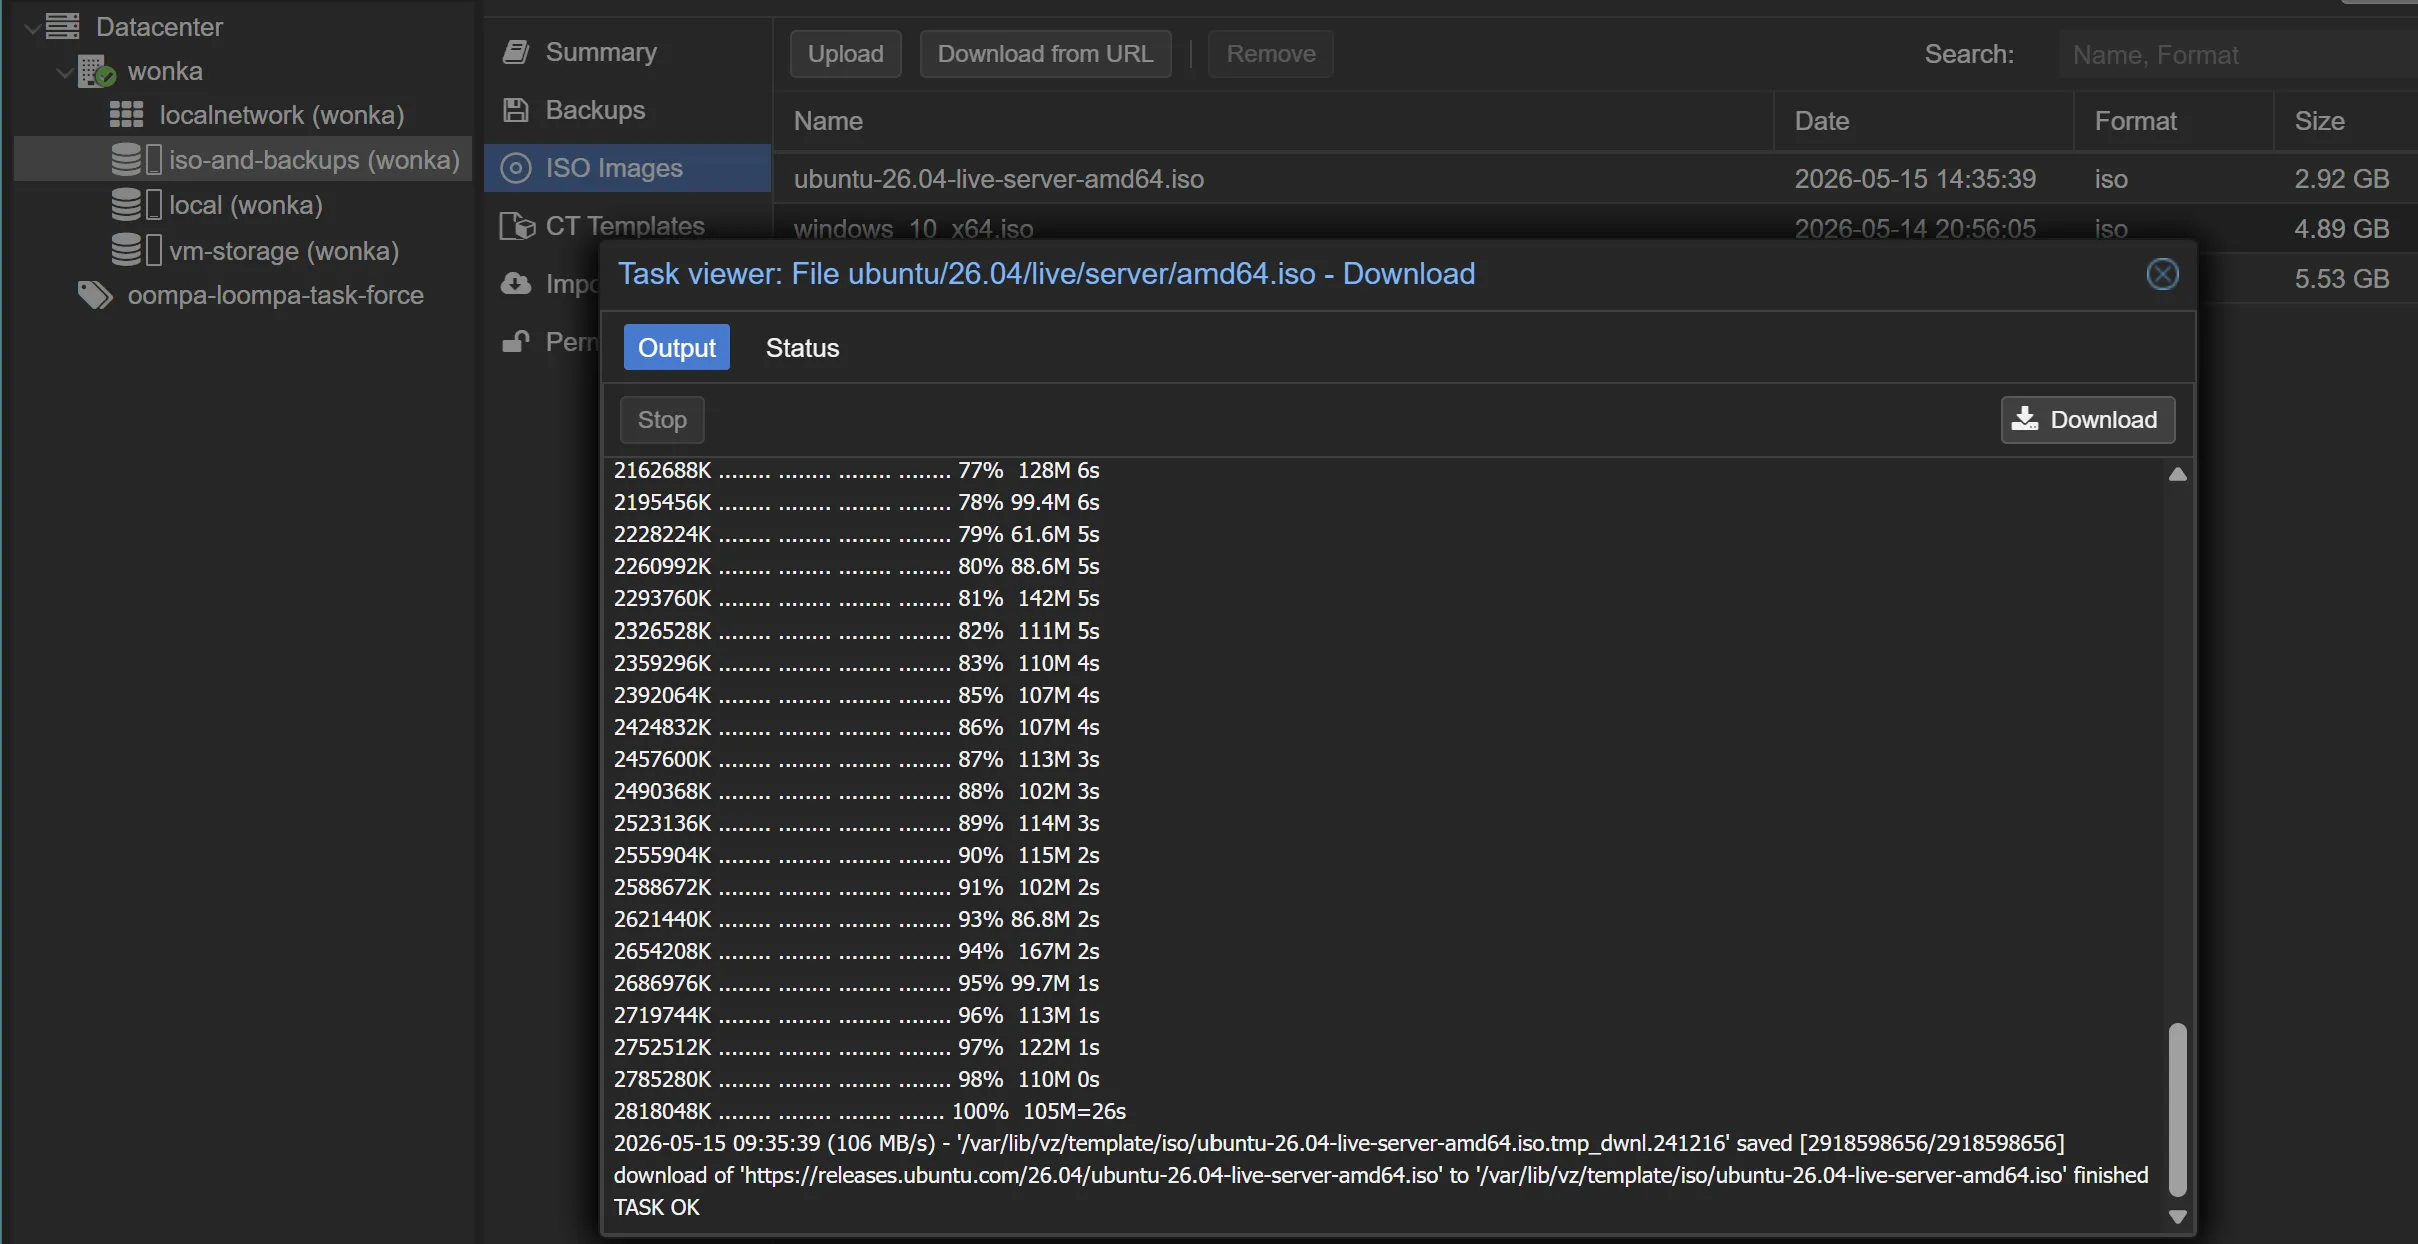
Step 2: Download Ubuntu Server 26.04 LTS ISO
NOTE: Proxmox can download ISOs directly to its local storage from a URL, which cuts out the middleman of saving the iso to your machine first, then uploading it to Proxmox.
To download the Ubuntu Server 26.04 LTS ISO from URL, follow these steps:
- In Proxmox, click you
main node's local storage. (Mine is called wonka) - Click
ISO images - Click `Download from URL
- Enter the following URL:
https://releases.ubuntu.com/26.04/ubuntu-26.04-live-server-amd64.iso- Click
Query URL(this will find and enter the image name), thenDownload
Preparing to download Ubuntu Server image from URL
Ubuntu Server image successfully downloaded from URL
Step 3: Create the Ubuntu Server VM
- Click
Create VMat the top-right of the Proxmox UI. - I applied the following settings (some are in the advanced menu):
General:
  - Node: `wonka`
  - VM ID: `100` (or accept the suggested next available)
  - Name: `oltf-hq`
  - Resource Pool: `oompa-loompa-task-force`
  - Start at boot: ✅
  - Click `Next`

OS tab
  - Use CD/DVD disc image (iso): ✅
  - Storage: iso-and-backups
  - ISO image: select the Ubuntu 26.04 ISO you downloaded
  - Type: Linux
  - Version: 6.x - 2.6 Kernel
  - Click Next

System tab
  - Machine: q35 (q35 is the modern chipset emulation)
  - BIOS: OVMF (UEFI)
  - Add EFI Disk: ✅
  - EFI Storage: vm-storage
  - Pre-Enroll keys: ❌
  - Qemu Agent: ✅
  - SCSI Controller: VirtIO SCSI single
  - Click Next

Disks tab
  - Bus/Device: SCSI, 0
  - Storage: vm-storage
  - Disk size (GiB): 64
  - SSD emulation: ✅
  - Discard: ✅
  - Click Next

CPU tab
  - Sockets: 1
  - Cores: 4
  - Type: host (passes through physical CPU's instruction set for max performance)
  - Click Next

Memory tab
  - Memory (MiB): 8192
  - Ballooning Device: ✅
  - Click Next

Network tab
  - Bridge: vmbr0
  - Model: VirtIO (paravirtualized)
  - Firewall: ✅
  - Click Next

Confirm tab
  - Review your settings.
  - Uncheck Start after created (if you want to watch it boot for the first time)
  - Click Finish
Step 4: Boot and Install Server
1. Select the new Ubuntu Server VM in the Proxmox tree.
2. Click `Start` at the top right.
3. Click `Console` to see the remote console.
4. At the GRUB boot menu, press `Enter` to select `Try or Install Ubuntu Server`
5. Go through the installer steps (I used the defaults throughout).
6. At storage configuration: Click `Done` and `Continue`
7. Setup profile (username and password)
8. Skip `Upgrade to Ubuntu Pro`
9. Install SSH Server (skipped linking to GitHub)
10. Skipped all Featured Snaps
11. Wait for installer to complete, then click `Reboot Now` and `Enter`
12. I had to "eject" the virtual CD after install to continue.
  - Click the VM tree in the proxmox web ui
  - Go to `Hardware`
  - Select `CD/DVD Drive (ide2)
  - Click `Edit`, change to `Do not use any media`
  - Cilck `OK`
# Successfully installed and accessed the Ubuntu Server 26.04 LTS
adminoompa@oltf-hq:~>Install Docker Engine on Ubuntu Server
What is Docker Engine?
Docker Engine is the core open-source technology used to build, containerize, and run applications. It acts as a lightweight runtime that allows developers to package an application with all its dependencies into a single unit called a container, ensuring it runs consistently across different environments.
For more information, visit Docker Docs HERE
Installing Docker Engine on Ubuntu Server
- Download the Docker Engine installation script HERE or simply run the following command from your ubuntu server command line:
curl -fsSL https://get.docker.com -o install-docker.shBelow is the Usage stated in the script:
# Usage
# ==============================================================================
#
# To install the latest stable versions of Docker CLI, Docker Engine, and their
# dependencies:
#
# 1. download the script
#
#   $ curl -fsSL https://get.docker.com -o install-docker.sh
#
# 2. verify the script's content
#
#   $ cat install-docker.sh
#
# 3. run the script with --dry-run to verify the steps it executes
#
#   $ sh install-docker.sh --dry-run
#
# 4. run the script either as root, or using sudo to perform the installation.
#
# $ sudo sh install-docker.sh- Run the Docker Engine Installation Script:
sudo sh install-docker.sh- Once the script runs, you can
update, upgrade, and reboot
sudo apt update && sudo apt upgrade -y
sudo reboot- Verify Docker daemon is active and running
systemctl is-active docker
active

or

systemctl status docker
● docker.service - Docker Application Container Engine
     Loaded: loaded (/usr/lib/systemd/system/docker.service; enabled; preset: >
     Active: active (running) since Fri 2026-05-15 23:34:21 UTC; 22h ago
This verifies the Docker daemon is installed and active.
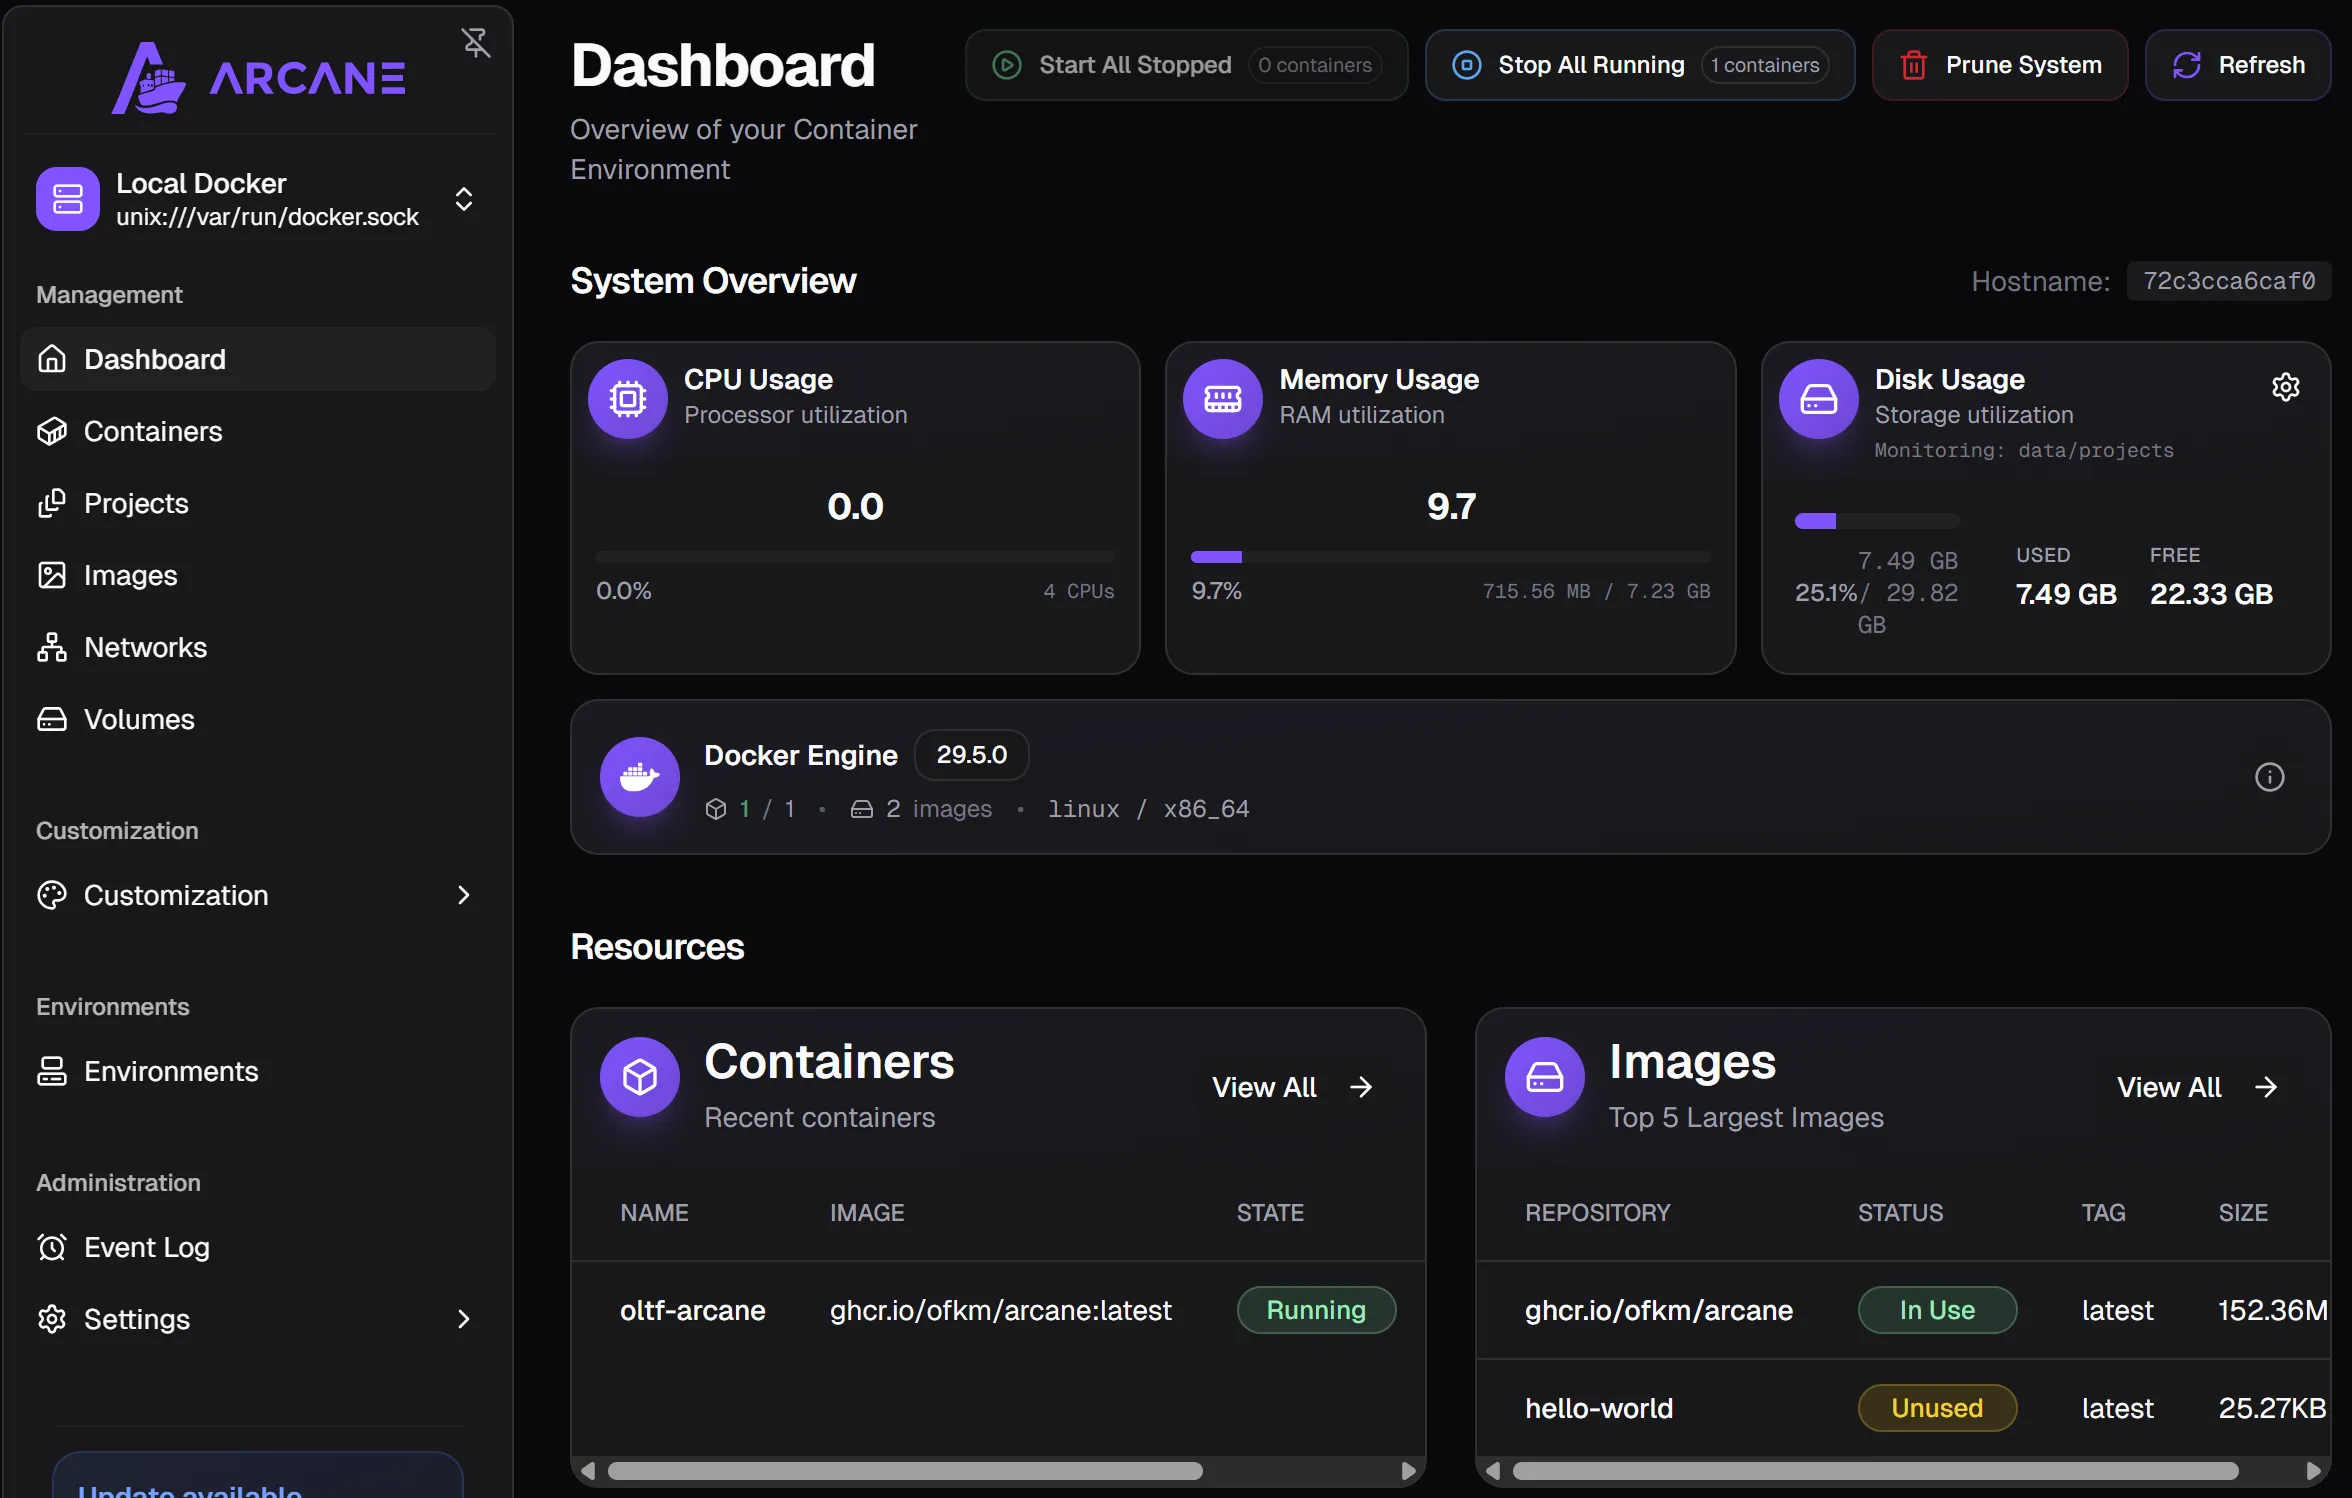
Starting Arcane Docker Management Service
What is Arcane?
Arcane is a self-hosted web dashboard for Docker. You point it at the Docker socket on your host (or a remote Docker API endpoint over TLS), and it gives you a browser UI to manage containers, images, networks, volumes, and Compose stacks. It runs as a single container itself.
Create docker-compose.yml in arcane folder
- Make /opt/arcane folder
mkdir -p ~/arcane && cd ~/arcane` - Generate the two required secrets (save somewhere safe)
echo "ENCRYPTION_KEY=$(openssl rand -hex 32)" echo "JWT_SECRET=$(openssl rand -hex 32)" - Create docker-compose.yml
services:
  arcane:
    image: ghcr.io/ofkm/arcane:latest
    container_name: oltf-arcane
    restart: unless-stopped
    ports:
      - "3552:3552"
    environment:
      APP_URL: "http://YOUR.SERVER.IP:3552"
      PUID: "1000"
      PGID: "1000"
      ENCRYPTION_KEY: "PASTE_KEY_HERE"
      JWT_SECRET:     "PASTE_KEY_HERE"
    volumes:
      - /var/run/docker.sock:/var/run/docker.sock
      - ./data:/app/data
Install and Start the Arcane Container
adminoompa@oltf-hq:~/arcane$ sudo docker compose up -d
[sudo: authenticate] Password:
[+] up 11/11
✔ Image ghcr.io/ofkm/arcane:latest Pulled                                                   5.5s
✔ Network arcane_default           Created                                                  0.1s
✔ Container oltf-arcane            Started                                                  1.0s
adminoompa@oltf-hq:~/arcane$
Access Arcane From Your Browser
- Access your new Arcane UI from your browser:
http://YOUR.SERVER.IP:3552 - First log on username:
arcane - First log on password:
arcane-admin - Update your password
That’s it!
Screenshot of first Arcane access